
You can train ChatGPT on your own data using three methods: a no-code platform like LiveChatAI that ingests your website, PDFs, and FAQs in minutes; OpenAI's Custom GPTs with file uploads; or Python fine-tuning through the OpenAI API. Each approach turns a general-purpose model into a domain-specific assistant that answers questions using your content.
What you'll need:
• Your training data (website URL, PDFs, CSVs, or plain text documents)
• An account on your chosen platform (LiveChatAI free tier, ChatGPT Plus at $20/month, or OpenAI API credits)
• Time estimate: 10 minutes (no-code) to 2-4 hours (Python fine-tuning)
• Skill level: Beginner-friendly (Methods 1-2) or Intermediate/Advanced (Method 3)
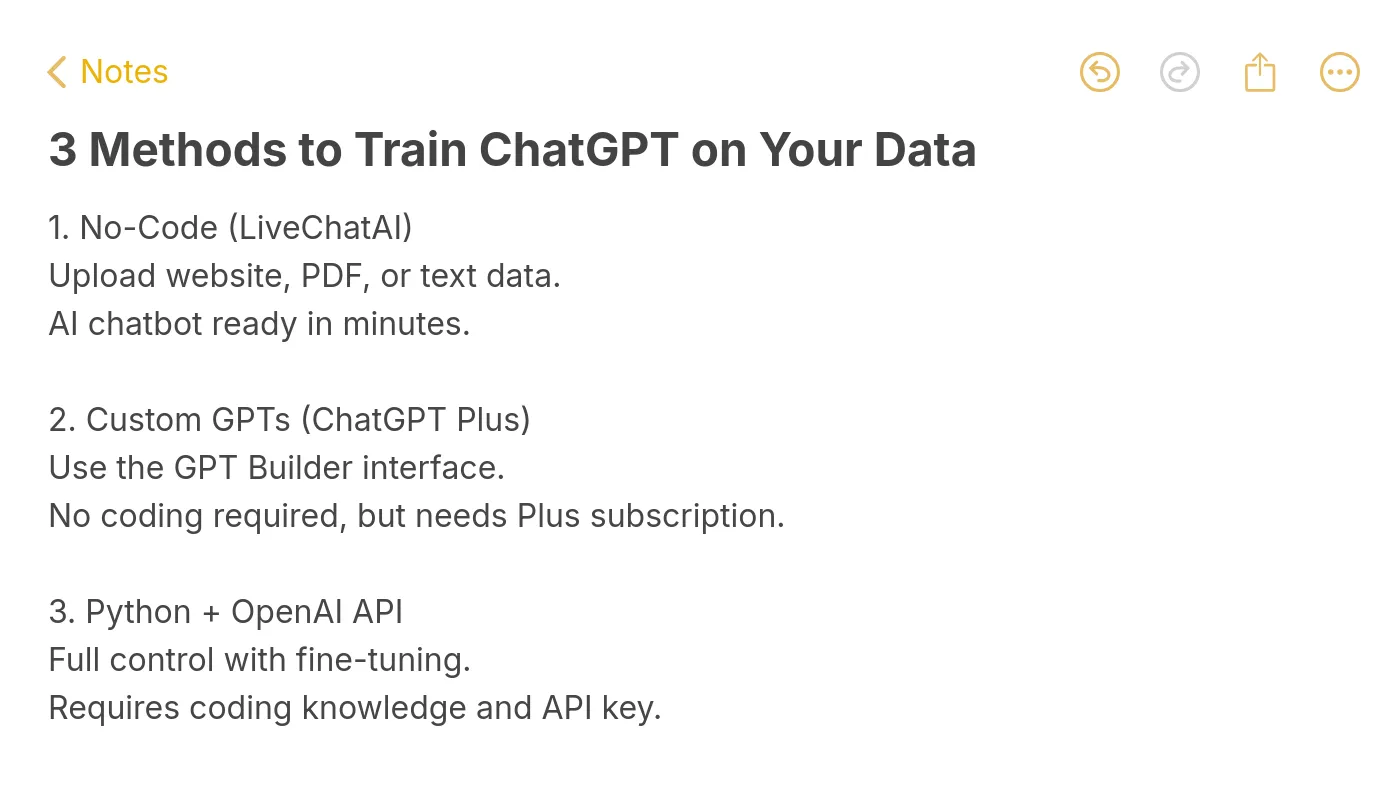
Quick overview of the three methods:
1. LiveChatAI (no-code) — Paste your website URL, select pages, and get an AI chatbot trained on your data in under 10 minutes. No coding needed.
2. OpenAI Custom GPTs — Upload files and configure instructions inside ChatGPT to build a custom assistant. Requires a ChatGPT Plus subscription.
3. Python + OpenAI API — Fine-tune a GPT model programmatically with JSONL training data for maximum control over behavior and output.
What Does "Training ChatGPT on Your Data" Actually Mean?
ChatGPT is OpenAI's conversational AI built on transformer architecture. Out of the box, it draws from its general training corpus. "Training it on your data" means feeding it your specific content — help docs, product specs, FAQs, support tickets — so it generates responses grounded in what your business actually offers.

There are three distinct approaches, and they differ in technical depth, cost, and flexibility:
• No-code platforms (like LiveChatAI) use retrieval-augmented generation (RAG) to ground ChatGPT's responses in your content. You upload data through a visual interface. The platform handles embeddings, vector storage, and query routing behind the scenes.
• Custom GPTs let you upload reference files and write system instructions directly inside ChatGPT. The model retrieves relevant chunks from your files at query time.
• Fine-tuning via the API adjusts the model's weights using your training examples. This changes how the model behaves at a fundamental level, not just what it can reference.
According to Arvow, ChatGPT now has over 800 million weekly active users. With that scale, businesses that customize the model with their own data gain a real edge in customer support quality and response accuracy.
Why Should You Train ChatGPT with Your Own Data?
Generic ChatGPT doesn't know your product, your pricing, or your support policies. That gap creates problems: wrong answers, hallucinated features, frustrated customers. Training it on your data fixes each of these.
1. Domain-specific accuracy. A chatbot trained on your help docs won't invent features you don't have. It pulls answers directly from your knowledge base, which cuts hallucination rates significantly. According to Master of Code, businesses using customized AI report 30-45% productivity gains and $75K+ in savings.
2. Brand voice consistency. Your support team has a tone. Maybe it's casual, maybe it's formal. A fine-tuned model or a RAG-powered chatbot can match that tone across every interaction, whether it's midnight on a Saturday or 9 AM on Monday.
3. Faster resolution times. Instead of routing customers through a decision tree or making them wait for a human agent, a trained chatbot resolves questions in seconds. This matters especially for e-commerce businesses handling high volumes of repetitive queries.
4. Scalability without headcount. Human support teams don't scale linearly. Hiring and training agents takes months. A chatbot trained on your data handles thousands of simultaneous conversations from day one.
5. Data privacy control. With platforms like LiveChatAI, your data stays on your infrastructure. You're not feeding sensitive customer information into a public model. According to Chanty, 82% of users describe their ChatGPT conversations as sensitive or highly sensitive, which makes data ownership a real concern.
6. Continuous improvement. Every conversation becomes training data for the next iteration. You can spot gaps in your knowledge base, add missing Q&A pairs, and watch accuracy improve over weeks.
Train ChatGPT on Your Data: 3 Methods Compared
Before diving into each method, here's how they stack up:
Method 1: Train ChatGPT on Your Data with LiveChatAI (No-Code)
This is the fastest path if you want a working AI chatbot on your website without writing a single line of code. LiveChatAI uses retrieval-augmented generation to ground every response in your actual content. The entire setup takes under 10 minutes.
Step 1: Sign Up and Create Your Account
Go to livechatai.com and create a free account. The free tier gives you enough capacity to build and test your first AI chatbot. No credit card required.
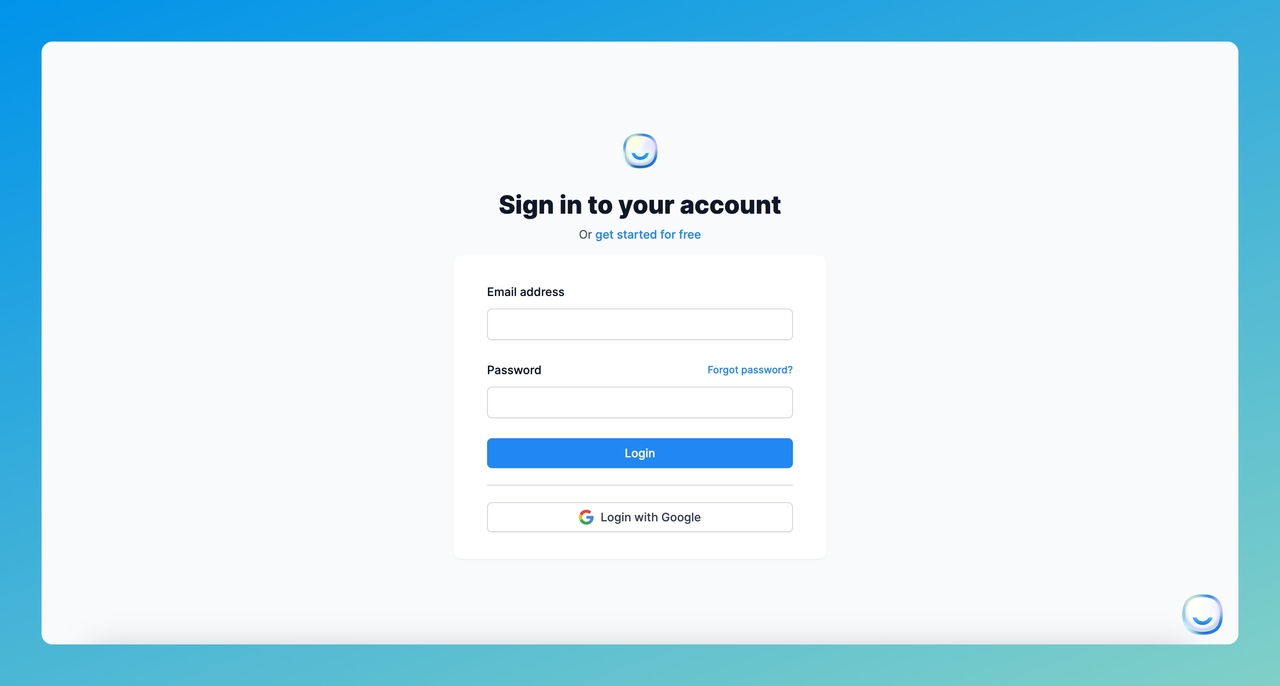
You'll know it's working when: You land on the dashboard with the option to create a new AI chatbot. You should see "Create New Chatbot" or a similar prompt front and center.
Watch out for:
• Using a personal email for a team project: If multiple people need access, use a shared workspace email. You can add team members later, but the primary account email can't be changed easily.
• Skipping email verification: Some features won't activate until you confirm your email. Check spam folders if the verification link doesn't arrive within 2 minutes.
Step 2: Add Your Data Source
This is where the training happens. You'll tell LiveChatAI where your content lives, and it will ingest everything automatically.
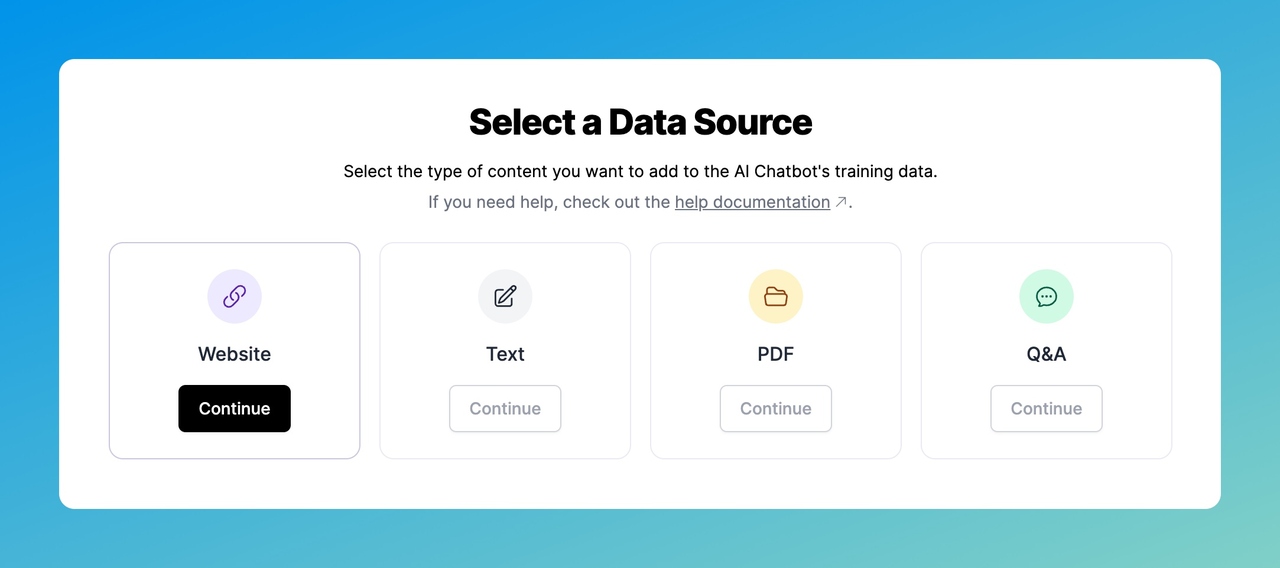
Click "Add Data Source" and choose from four options:
1. Website: Paste your domain URL or sitemap URL. LiveChatAI crawls every page and extracts the text content. This is the fastest option if your knowledge base lives on your website.
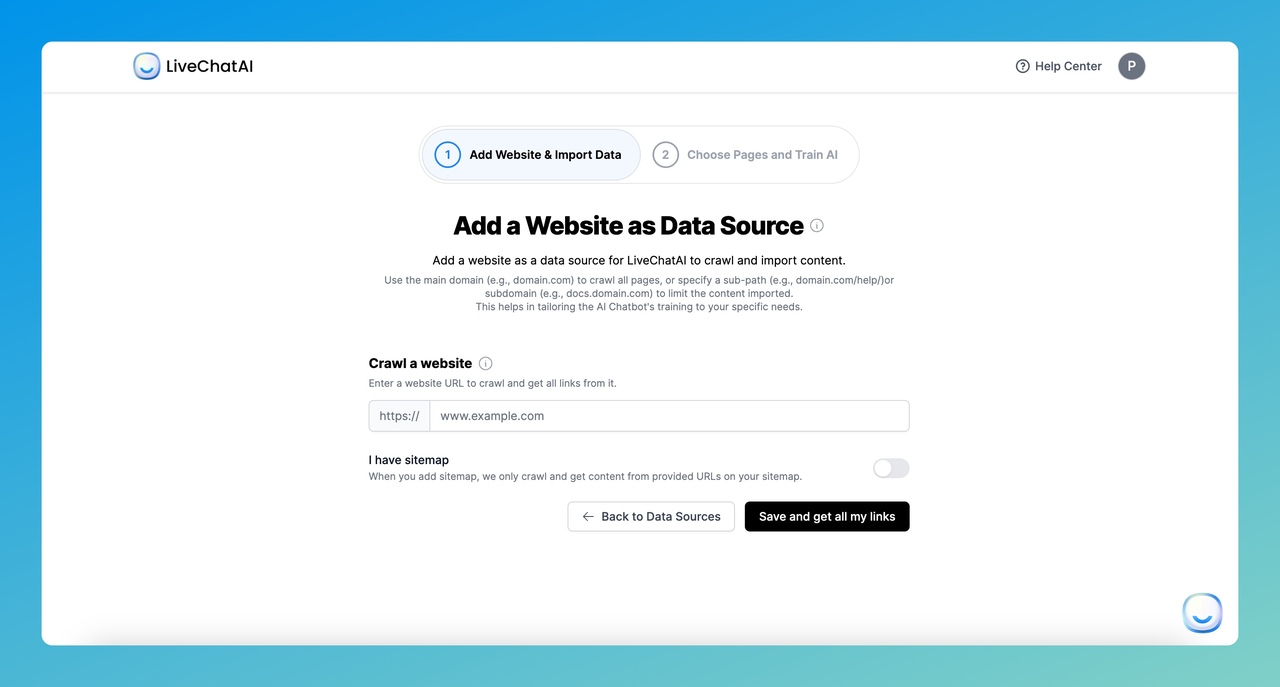
After pasting your URL, click "Save and get all my links". The crawler will pull all discoverable pages. If you use a sitemap, click "Save and load sitemap" instead.
2. Text: Paste plain text directly. Good for internal policies, product descriptions, or custom instructions that don't live on a public webpage.
3. PDF: Upload PDF documents from your computer. The parser extracts text from multi-page documents, including formatted tables and lists. Useful for training manuals, whitepapers, or product catalogs.
4. Q&A: Add specific question-answer pairs manually, generate them with AI assistance, or bulk-import from a CSV file. This gives you the most precise control over how specific questions get answered.
According to OpenAI, ChatGPT can analyze data in Excel, CSV, PDF, and JSON formats. LiveChatAI supports all of these as training data sources.
You'll know it's working when: You see a list of pages or documents populating in the interface, with character counts displayed for each.
Watch out for:
• Crawling a site with JavaScript-rendered content: If your pages load content dynamically (single-page apps, heavy React sites), the crawler may miss text. Test by checking if the extracted content looks complete. If it's sparse, export your content as text or PDF instead.
• Uploading outdated documents: The chatbot will confidently serve stale information. Make sure your PDFs and text files reflect current pricing, features, and policies before uploading.
Pro tip: You can always update your data by going to the "Manage Data Sources" section. I'd recommend setting a monthly reminder to refresh your content, especially if your product ships frequent updates.
Step 3: Select Pages and Import Your Content
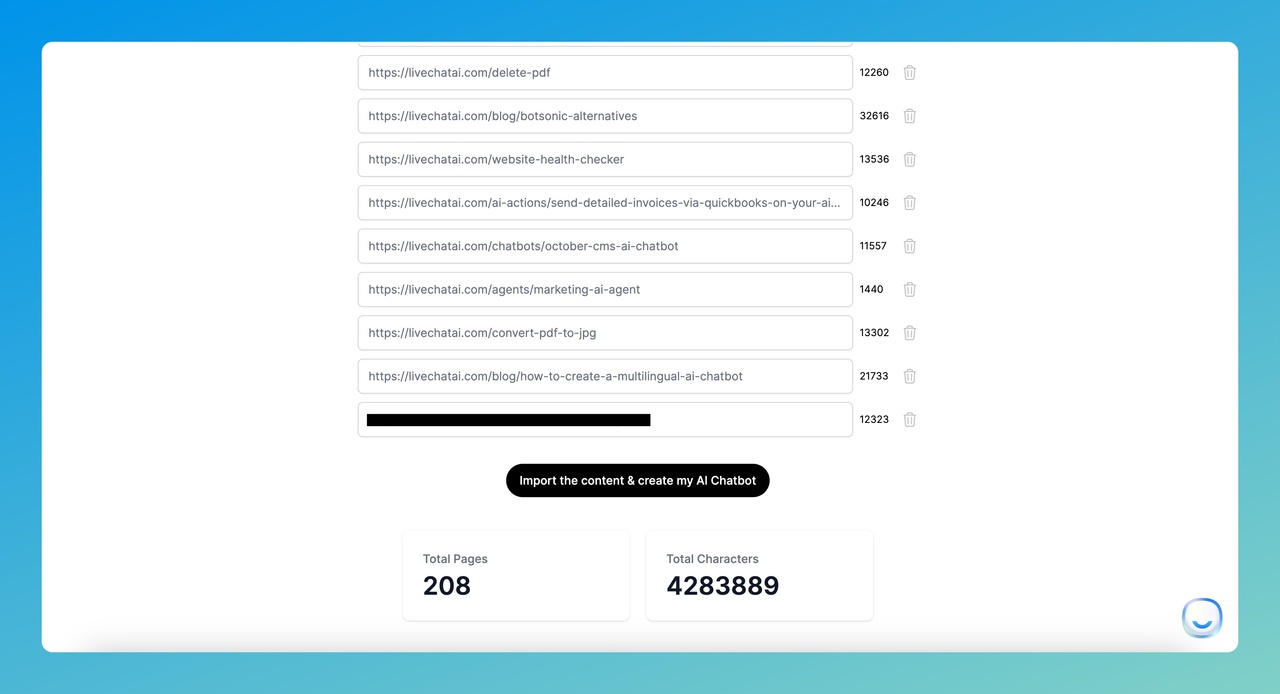
After the crawler finishes, you'll see every discovered page listed with checkboxes.
1. Review the page list and uncheck anything irrelevant (login pages, empty templates, legal boilerplate that won't help customers).
2. Delete unneeded pages by clicking the trash icon next to each.
3. Check the total pages and total characters counter at the bottom. This tells you how much training data you're working with.
4. Click "Import the content & create my AI Chatbot" to start the training process.
The import typically takes 1-5 minutes depending on volume. Larger sites with hundreds of pages may take a bit longer.
You'll know it's working when: A progress bar appears showing the import status. Once complete, you'll be redirected to the chatbot configuration screen.
Watch out for:
• Importing too many irrelevant pages: Blog archives, tag pages, and author pages add noise without useful training data. Be selective. Quality beats quantity here. A focused knowledge base of 50 relevant pages will outperform 500 pages of mixed content.
• Ignoring the character count: Free tier accounts have character limits. If you're close to the cap, prioritize your most-visited help articles and FAQ pages.
Step 4: Configure Human Handoff and Response Settings
A modal appears asking whether you want to include human agent support alongside the AI.
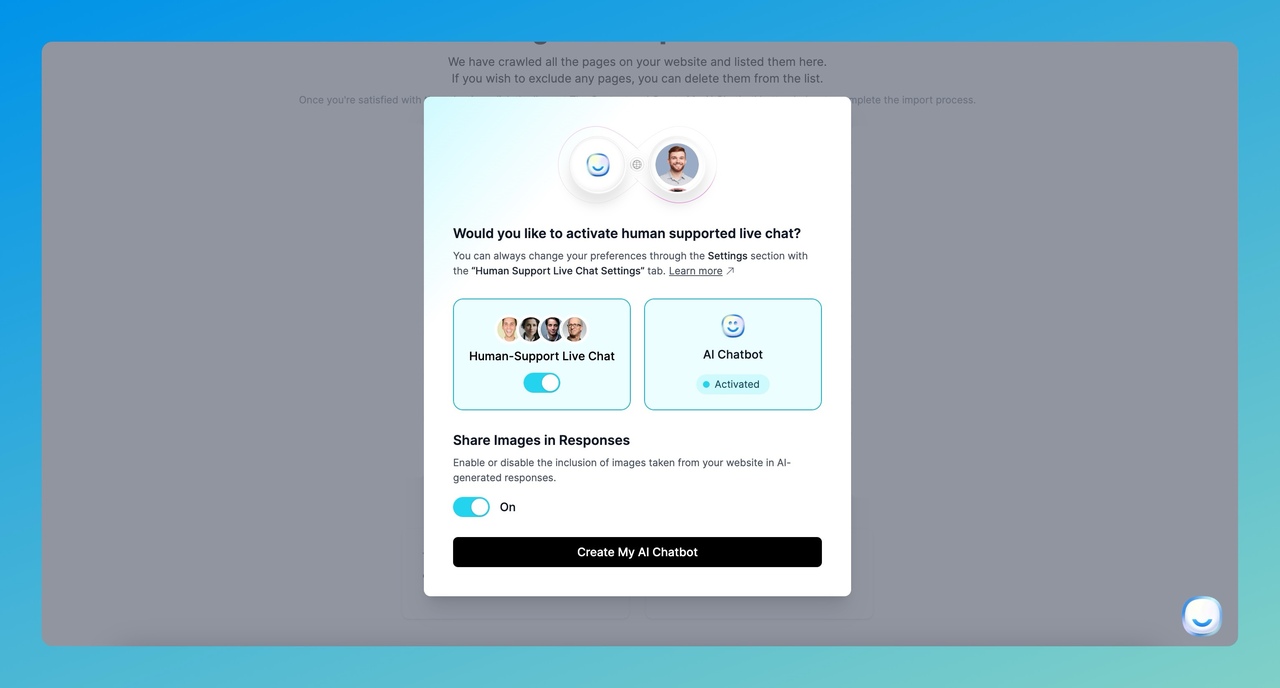
Toggle "Human Support" on if you want customers to reach a live agent when the AI can't answer. This creates a fallback path that prevents dead-end conversations.
You can also enable image responses, which lets the AI include relevant images from your data sources when answering questions. This works well for product-related queries where visuals help.
You'll know it's working when: The toggle switches to "Active" and you see configuration options for agent routing and notification preferences.
Watch out for:
• Leaving human handoff disabled on a customer-facing bot: There will always be edge cases the AI can't handle. Without a fallback, those customers bounce. Always keep a human escalation path open for complex or sensitive issues.
• Not setting business hours for live agent availability: If human support is enabled but no one is online, customers get stuck waiting. Configure time scheduling under Settings > Time Scheduling so the bot sets accurate expectations.
Pro tip: Enable image responses if you sell physical products or have a visual product. Screenshots and product images in chat responses increase customer confidence and reduce follow-up questions.
Step 5: Preview, Test, and Deploy Your AI Chatbot
Your AI chatbot is now live in the dashboard. Here's what to do next.
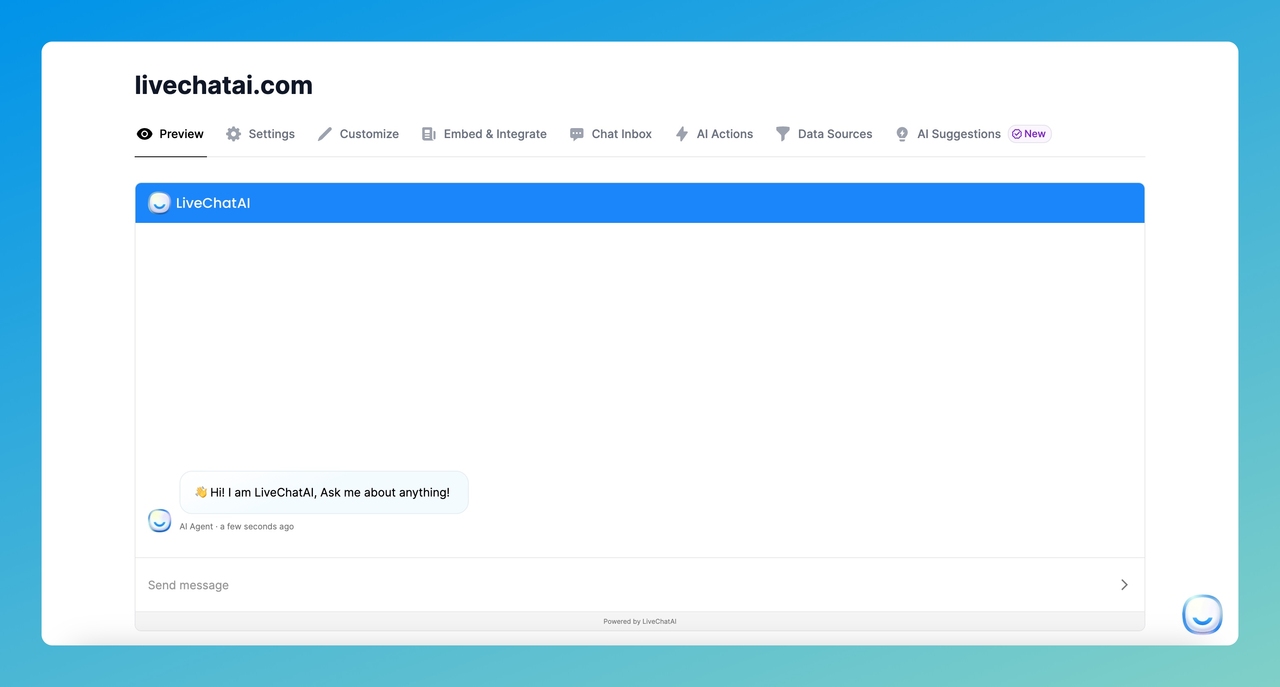
1. Click "Preview" and ask 5-10 test questions covering your most common customer queries. Check that answers are accurate and sourced from your data.
2. Go to "Settings" to adjust your AI model preferences, rate limiting, and prompt instructions.
3. Open "Customize" to match the chat widget's colors, avatar, and greeting message to your brand.
4. Navigate to "Embed & Share" to get the embed code for your website. Options include a floating widget, inline iframe, or full-page chat.
5. Check "Chat Inbox" to monitor conversations and spot gaps in your training data.
6. Review "AI Suggestions" for queries that customers asked but the bot couldn't answer well. Add these as Q&A data sources to improve accuracy over time.
For a detailed walkthrough on deploying your chatbot, see our guide on how to implement a chatbot without coding.
You'll know it's working when: The preview chatbot answers your test questions with information pulled directly from your imported content, not generic AI responses.
Watch out for:
• Deploying without testing edge cases: Ask intentionally tricky or off-topic questions. Verify the bot either answers correctly or gracefully declines. A chatbot that confidently gives wrong answers is worse than no chatbot at all.
• Forgetting to customize the greeting: The default greeting is generic. A personalized welcome message ("Hi! I'm trained on [Company]'s help docs. Ask me anything about our products.") sets proper expectations and improves engagement.
Pro tip: After launching, check the Chat Inbox and AI Suggestions sections weekly for the first month. The first 100 conversations will reveal exactly which topics your training data covers well and where it falls short. I've seen teams cut their support ticket volume by 40-50% within the first month just by filling these gaps iteratively.
Method 2: Train ChatGPT Using OpenAI Custom GPTs
Custom GPTs let you build a personalized ChatGPT assistant by uploading files and writing instructions. This method works well for internal tools, personal productivity, or prototyping. The main limitation: your custom GPT lives inside ChatGPT's interface, so you can't embed it on your website or connect it to your CRM.
You'll need a ChatGPT Plus subscription ($20/month) to create custom GPTs. Free accounts can use GPTs others have built, but can't create new ones.
Step 1: Open the GPT Builder
Log into ChatGPT, click "Explore GPTs" in the left sidebar, then click "Create" in the top-right corner.
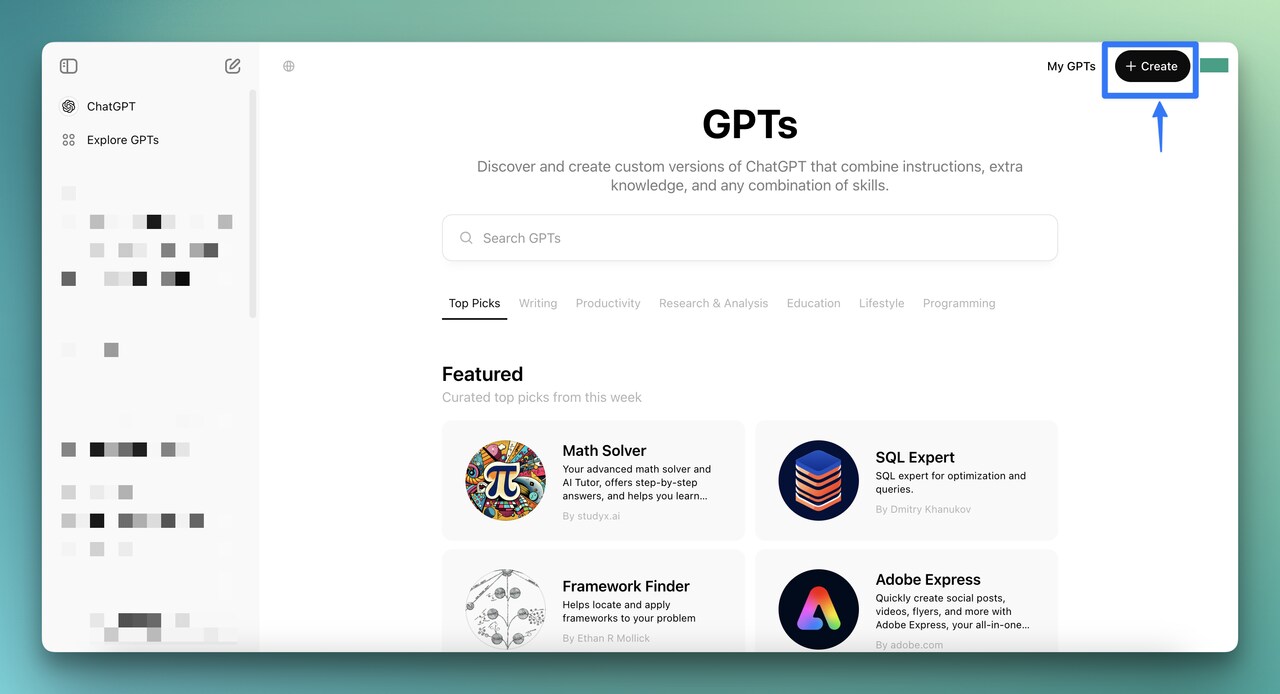
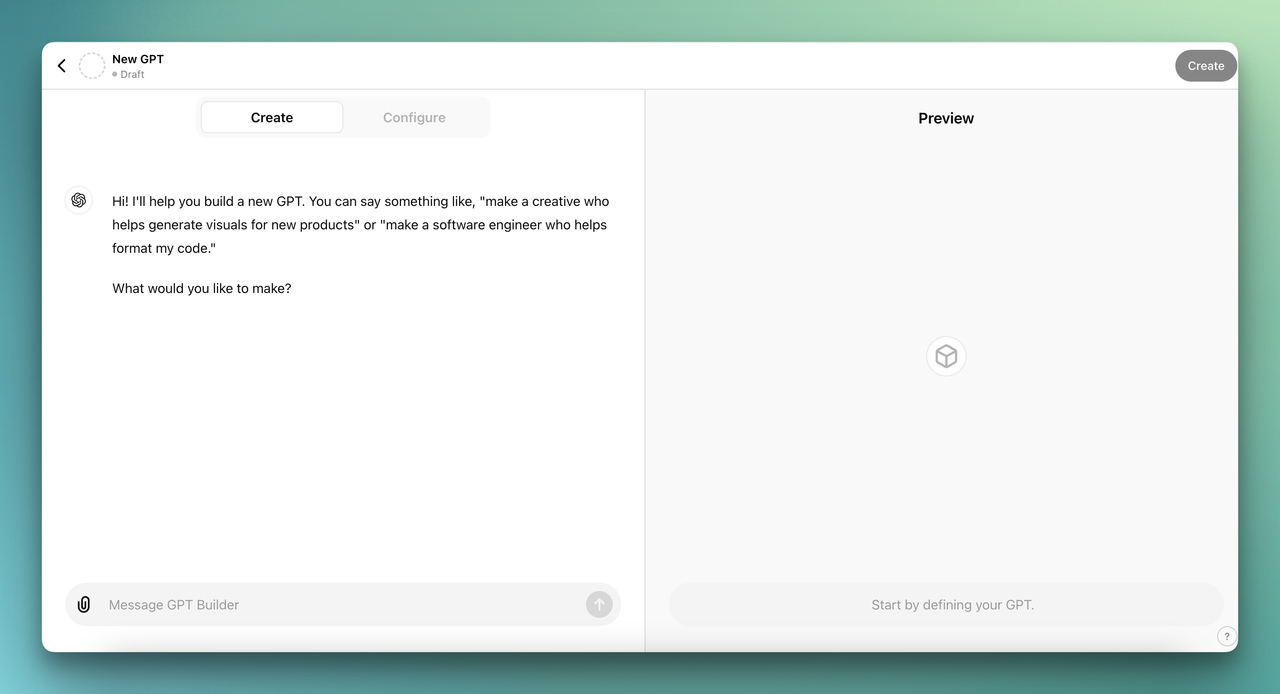
You'll know it's working when: The GPT Builder opens with two tabs: "Create" (conversational setup) and "Configure" (manual setup).
Watch out for:
• Not having a Plus subscription: The "Create" button won't appear on free accounts. You'll need to upgrade first.
• Browser extensions interfering: Ad blockers and privacy extensions sometimes break the GPT Builder interface. If buttons don't respond, try an incognito window.
Step 2: Configure Your Custom GPT
You have two paths here. The "Create" tab lets you describe your GPT in natural language ("I want a customer support bot that knows about product X"), and the builder generates the configuration. The "Configure" tab gives you direct control over every field.
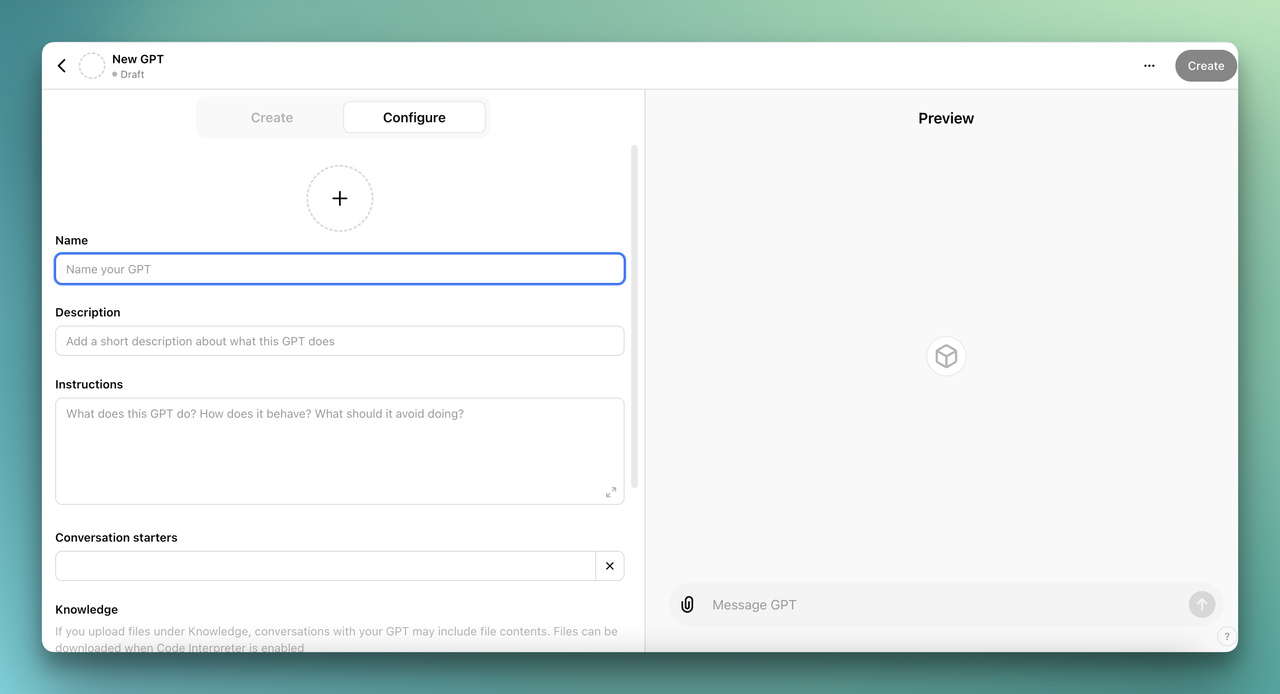
In the Configure tab, fill in:
1. Name: Something descriptive. "Acme Support Bot" is better than "My GPT."
2. Description: One sentence explaining what it does and who it's for.
3. Instructions: This is your system prompt. Be specific about tone, scope, and behavior. Example: "You are a support agent for Acme Corp. Answer questions using only the uploaded knowledge base. If you don't know the answer, say so and suggest contacting [email protected]."
4. Knowledge: Upload your files here. Drag in PDFs, CSVs, text files, or JSON documents. The model will reference these when answering questions.
5. Capabilities: Toggle web browsing, code interpreter, and image generation on or off depending on your use case.
You'll know it's working when: The Preview panel on the right shows your GPT responding to test prompts using information from your uploaded files.
Watch out for:
• Writing vague instructions: "Be helpful" tells the model nothing. Instead, specify: what topics it should cover, what topics it should refuse, what tone to use, and how to handle uncertainty. The more specific your system prompt, the better the output.
• Uploading massive files without structure: A 200-page PDF without clear headings makes retrieval unreliable. Break large documents into topic-specific files (pricing.pdf, features.pdf, troubleshooting.pdf) for better accuracy.
Pro tip: Start with 3-5 focused documents rather than dumping everything at once. Test with real questions, identify gaps, then add more files. I've found that iterative knowledge building produces much more accurate responses than a single bulk upload.
Step 3: Test and Publish Your Custom GPT
Use the Preview panel to send 10-15 test questions. Mix easy factual queries ("What's the pricing for Plan X?") with harder judgment calls ("Should a small team use Plan A or Plan B?").
When you're satisfied, click "Create" in the top-right corner. Choose your sharing setting:
• Only me: Private, visible only in your account.
• Only people with a link: Anyone with the URL can use it (they still need a ChatGPT account).
• Everyone: Listed in the GPT Store for public discovery.
For a deeper walkthrough on embedding GPTs externally, check out our guide on how to add custom GPTs to your website.
You'll know it's working when: You can access your GPT from the "My GPTs" section and it responds accurately to questions based on your uploaded data.
Watch out for:
• Assuming the GPT stays current: Custom GPTs don't auto-update when your source documents change. If your pricing or features change, you need to re-upload the updated files manually.
• Sharing sensitive data via "Everyone" mode: Anything in your uploaded files could surface in responses. Don't upload confidential internal documents if you plan to make the GPT public.
Custom GPT Limitations for Business Use
Custom GPTs have gaps that matter for production deployments. There's no CRM integration, no analytics dashboard, no way to embed the chat widget on your website natively, and every user needs their own ChatGPT subscription. For a comparison of these approaches, see our FAQ about LiveChatAI vs ChatGPT.
If you need a customer-facing chatbot with analytics, multi-channel deployment, and human handoff, a purpose-built platform will save you significant workaround time.
Method 3: Train ChatGPT Using Python and the OpenAI API
This method gives you maximum control over model behavior. You'll prepare training data in JSONL format, submit it through the API, and get a fine-tuned model that responds differently from the base GPT. This is the right choice when you need custom behavior patterns, not just custom knowledge retrieval.
Keep in mind: this method requires Python programming experience and an OpenAI API account with billing enabled.
Step 1: Install Python and Set Up Your Environment
Check if Python 3.8+ is installed by opening Terminal and running python3 --version. If it's not installed, download Python from the official site.

Next, upgrade pip and install the required libraries:
pip install --upgrade pip
pip install openai
pip install tiktoken (for counting tokens before submitting training data)
If you want to build a simple web interface to test your fine-tuned model, also install Gradio:
pip install gradio
You'll know it's working when: Running python3 -c "import openai; print(openai.__version__)" prints a version number without errors.
Watch out for:
• Using Python 2.x: The OpenAI SDK requires Python 3.8 or later. If python --version shows 2.x, use python3 explicitly or update your PATH.
• Permission errors during pip install: Use pip install --user openai or work inside a virtual environment (python3 -m venv myenv) to avoid system-level permission issues.
Step 2: Get Your OpenAI API Key
Go to platform.openai.com/api-keys and click "Create new secret key".
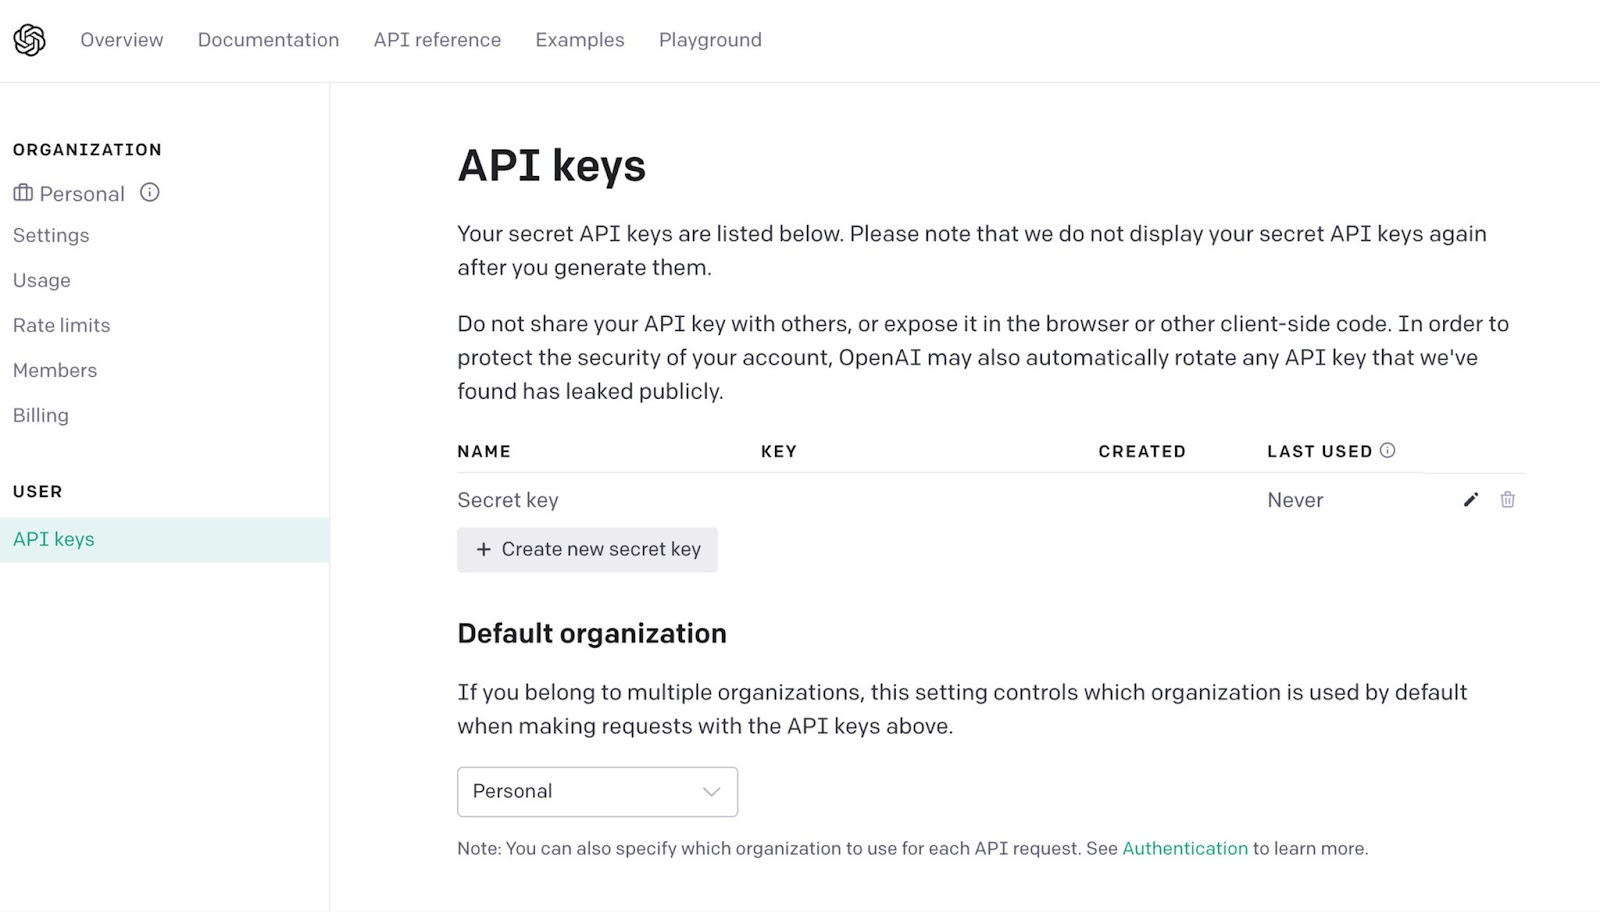
Copy the key immediately. OpenAI won't show it again after you close the dialog. Store it in an environment variable:
export OPENAI_API_KEY="sk-your-key-here"
Add this to your .bashrc or .zshrc so it persists across terminal sessions.
You'll know it's working when: Running python3 -c "import openai; client = openai.OpenAI(); print('Connected')" prints "Connected" without authentication errors.
Watch out for:
• Hardcoding the API key in your script: If you push code to a public repository, your key gets exposed. Always use environment variables or a .env file (added to .gitignore).
• Not setting billing limits: Fine-tuning costs real money. Go to Settings > Billing > Usage limits in the OpenAI dashboard and set a hard cap before you start. According to Incremys, over 2 million developers use the ChatGPT API, so OpenAI's billing documentation is well-established.
Step 3: Prepare Your Training Data in JSONL Format
OpenAI fine-tuning requires data in JSONL format (one JSON object per line). Each entry needs a "messages" array with system, user, and assistant roles.
Example training entry:
{"messages": [{"role": "system", "content": "You are a support agent for Acme Corp."}, {"role": "user", "content": "What's your return policy?"}, {"role": "assistant", "content": "We offer 30-day returns on all unused products. Contact [email protected] to start the process."}]}
You'll need at least 10 training examples, but OpenAI recommends 50-100 for noticeable quality improvements. Gather these from your actual support conversations, FAQ pages, and product documentation.
Save your file as training_data.jsonl in your project directory.
You'll know it's working when: You can open the file in a text editor and each line is a valid JSON object with the messages array structure.
Watch out for:
• Using regular JSON instead of JSONL: A JSON array with commas between entries will fail validation. Each line must be a standalone JSON object with no trailing commas.
• Including personally identifiable information: Scrub customer names, emails, and account numbers from your training examples. Fine-tuned models can regurgitate training data verbatim. For more on data handling, see does ChatGPT save data.
Step 4: Upload Data and Start Fine-Tuning
Use the OpenAI Python SDK to upload your training file and create a fine-tuning job:
from openai import OpenAI
client = OpenAI()
file = client.files.create(file=open("training_data.jsonl", "rb"), purpose="fine-tune")
job = client.fine_tuning.jobs.create(training_file=file.id, model="gpt-4o-mini-2024-07-18")
print(f"Fine-tuning job created: {job.id}")
The training process runs on OpenAI's servers. Duration depends on dataset size. Small datasets (50-100 examples) typically complete in 10-30 minutes. Larger sets can take hours.
Monitor progress with:
events = client.fine_tuning.jobs.list_events(fine_tuning_job_id=job.id)
You'll know it's working when: The job status changes from "validating_files" to "running" to "succeeded." You'll receive the fine-tuned model ID (like ft:gpt-4o-mini-2024-07-18:org-name::job-id).
Watch out for:
• Data validation failures: The API checks your JSONL format before training begins. Common errors include missing "role" fields, empty "content" strings, or exceeding the token limit per example. Fix these before re-submitting.
• Overfitting on small datasets: With fewer than 50 examples, the model may memorize responses rather than learning patterns. If your fine-tuned model repeats training examples verbatim for novel questions, add more diverse training data.
Pro tip: Start with gpt-4o-mini for fine-tuning. It's cheaper and faster than full GPT-4, and for most business use cases, the quality difference is negligible. You can always upgrade later if you need more capability.
Step 5: Test Your Fine-Tuned Model
Once training completes, test the model with queries it hasn't seen before:
response = client.chat.completions.create(model="ft:gpt-4o-mini-2024-07-18:your-org::your-job-id", messages=[{"role": "user", "content": "What's your shipping policy?"}])
print(response.choices[0].message.content)
Compare responses against your actual documentation. Check for accuracy, tone consistency, and hallucination. If the model invents information not in your training data, you may need to add explicit "I don't know" examples to teach it appropriate uncertainty.
You'll know it's working when: The model answers domain-specific questions accurately using the patterns and information from your training data, while declining or hedging on topics outside its training scope.
How to Prepare Your Training Data for Best Results

Regardless of which method you choose, the quality of your training data determines the quality of your chatbot's responses. Bad data in, bad answers out.
Step 1: Collect and Curate Your Data
Pull content from every relevant source: help center articles, support ticket transcripts, product documentation, FAQ pages, onboarding guides, and internal knowledge base articles.
Don't grab everything blindly. Prioritize content that addresses real customer questions. Your support ticket history is a goldmine here because it tells you exactly what people actually ask, not what you think they'll ask.
Watch out for:
• Including outdated content: Old pricing pages, deprecated features, or last year's policies will confuse the model. Audit your sources for freshness before importing.
• Forgetting to anonymize: Remove customer names, email addresses, phone numbers, and account IDs from support transcripts. This isn't optional. Data privacy regulations like GDPR and CCPA carry real penalties for non-compliance.
Step 2: Clean and Preprocess
Remove duplicate content, fix formatting inconsistencies, and strip HTML artifacts. If you're working with support transcripts, clean up agent shorthand and internal jargon that customers wouldn't understand.
For fine-tuning specifically, structure each example as a clear input-output pair. The "user" message should resemble how real customers phrase their questions (including typos and informal language). The "assistant" message should be the ideal response.
Step 3: Format for Your Chosen Method
Each method expects data differently:
Step 4: Split Into Training and Validation Sets
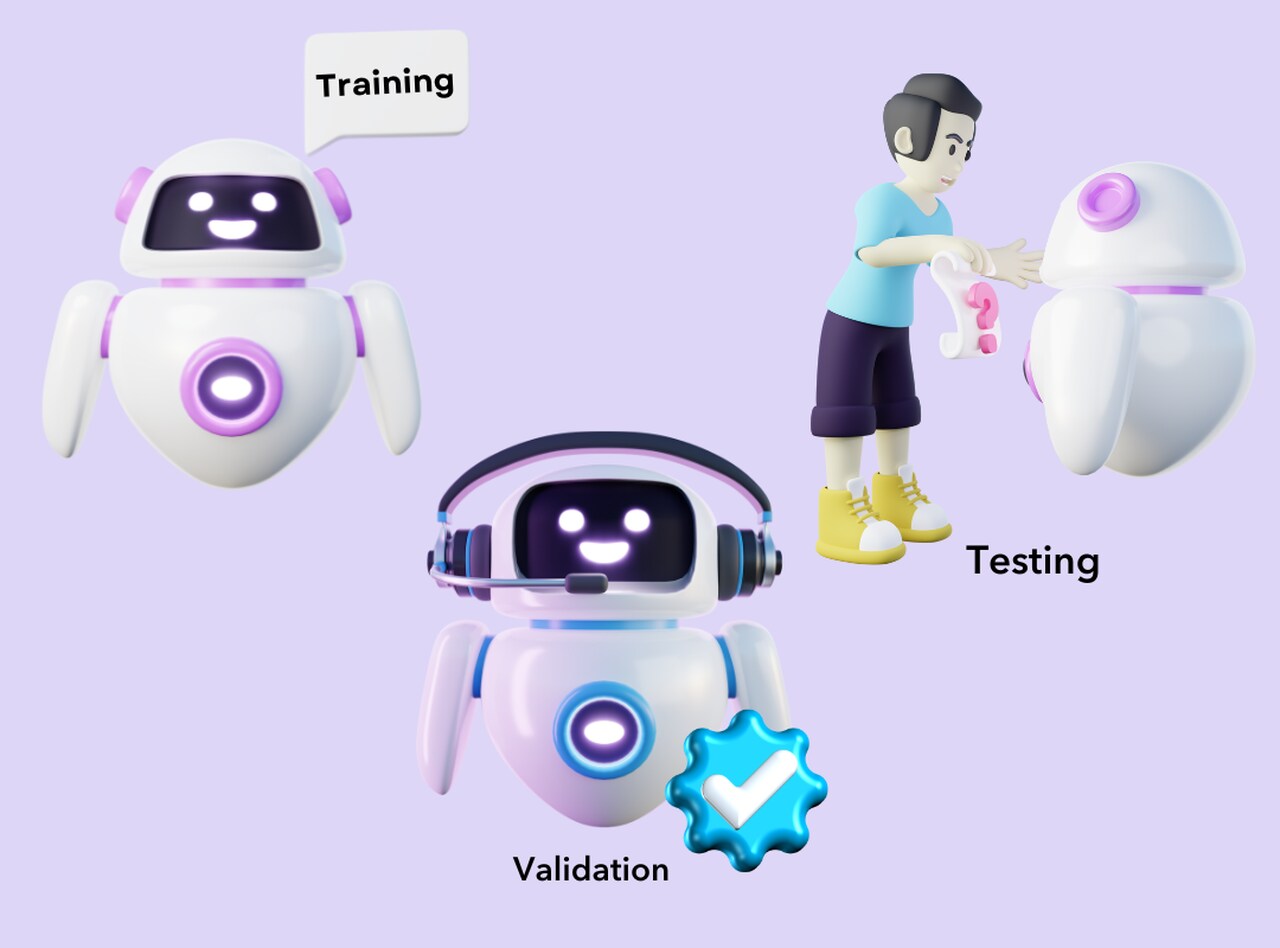
If you're fine-tuning with the API, split your data: 80% for training, 10% for validation, 10% for testing. The validation set helps you catch overfitting during training. The test set gives you an unbiased accuracy measurement after training completes.
For no-code platforms and Custom GPTs, this split isn't necessary because the platform handles retrieval rather than weight adjustment.
Data Privacy and Compliance Considerations
Training an AI on your business data raises real privacy and compliance questions, especially if that data includes customer interactions.
• Anonymize everything: Strip personally identifiable information before it touches any training pipeline. Names, emails, phone numbers, account IDs, payment details — all of it goes.
• Understand data retention policies: OpenAI retains API data for 30 days for abuse monitoring (as of 2026). Custom GPTs store uploaded files on OpenAI's servers. Know where your data lives and for how long. For more details, read our analysis of whether ChatGPT saves your data.
• Use secure storage: Keep training datasets in encrypted storage. Treat them with the same security posture as your production database.
• Check regulatory requirements: GDPR (EU), CCPA (California), and similar regulations have specific rules about using personal data for AI training. If you're handling customer data from regulated markets, consult legal counsel before proceeding.
With self-hosted solutions or platforms like LiveChatAI that keep data on your infrastructure, you maintain full ownership and control. This matters more than most teams realize until an audit happens.
What Results to Expect After Training
Setting realistic expectations prevents disappointment. Here's what a typical timeline looks like:
Week 1: Your chatbot handles 60-70% of common queries accurately right out of the gate. The remaining 30-40% will surface gaps in your training data. Use the chat inbox to identify these gaps.
Weeks 2-4: After adding Q&A pairs for the most common failure cases, accuracy climbs to 80-85%. Response quality improves noticeably as you refine the training data based on real conversations.
Month 2-3: With consistent iteration, well-trained chatbots reach 90%+ accuracy on in-scope questions. At this point, you should see measurable reduction in support ticket volume. According to Zapier, training ChatGPT on your own data transforms it from a general-purpose assistant into a specialized expert.
Ongoing: Plan to refresh your training data whenever your product, pricing, or policies change. A quarterly review catches most drift. If you're in a fast-moving space, monthly refreshes keep the chatbot current.
Track these metrics to measure success: resolution rate (conversations closed without human intervention), accuracy (correct answers vs. total answers), customer satisfaction (post-chat ratings), and ticket deflection (reduction in support tickets). For teams exploring revenue impact, see how AI chatbots can increase sales.
Conclusion
Training ChatGPT on your own data isn't a single-path problem. You have three clear options: LiveChatAI for fast, no-code deployment that's ready for customer-facing use; Custom GPTs for quick internal tools and personal productivity; and Python fine-tuning for maximum control when you need custom model behavior.
Start with the simplest method that fits your use case. For most businesses, that means trying the no-code route first. You can always layer in more complexity later. The hardest part isn't the technology. It's curating clean, accurate training data and committing to regular updates.
If you want to get a chatbot running on your site today, create a free LiveChatAI account and import your first data source. Ten minutes from now, you'll have a working prototype you can test with real questions.
Frequently Asked Questions
Can I train ChatGPT with my own data for free?
Partially, yes. LiveChatAI offers a free tier that lets you build and test an AI chatbot trained on your data with limited message volume. OpenAI's fine-tuning API has no free tier but charges per token, so small training jobs cost just a few dollars. Custom GPTs require a $20/month ChatGPT Plus subscription. For most businesses starting out, LiveChatAI's free plan provides enough capacity to validate the concept before committing budget.
How long does it take to train ChatGPT on your own data?
It depends on the method. With LiveChatAI, you can have a working chatbot in under 10 minutes: paste your URL, select pages, click import. Custom GPTs take 15-30 minutes to configure and test. Python fine-tuning takes 2-4 hours end-to-end, including data preparation, upload, training (10-30 minutes for small datasets on OpenAI's servers), and testing. The bottleneck is usually data preparation, not the actual training process.
What are the risks of training ChatGPT on business data?
The main risks are data privacy exposure, hallucination, and stale information. If you upload sensitive data to OpenAI's servers, it's subject to their data retention policies. Fine-tuned models can sometimes reproduce training data verbatim, which is a problem if that data contains PII. And chatbots trained on outdated content will confidently serve wrong answers. Mitigate these by anonymizing data, testing thoroughly, and scheduling regular content refreshes.
How do I make sure ChatGPT does not train on my data?
If you're using the ChatGPT web interface, go to Settings > Data Controls and disable "Improve the model for everyone." This opts your conversations out of training. For API usage, OpenAI states that data sent via the API is not used for model training by default. Using a self-hosted solution or a platform like LiveChatAI that runs on your infrastructure gives you the strongest guarantee. Our article on ChatGPT data handling covers this in detail.
What tools do I need to train ChatGPT on custom data?
For the no-code route, you only need a web browser and your content (website URL, PDFs, or text files). For Custom GPTs, add a ChatGPT Plus subscription. For Python fine-tuning, you need Python 3.8+, the OpenAI Python SDK, a code editor, and an OpenAI API account with billing enabled. You'll also want a tool like a validation framework to measure accuracy after training.
Which method should I choose for customer support?
For customer-facing support, go with LiveChatAI or a similar purpose-built platform. Custom GPTs lack website embedding, analytics, and CRM integration, and they require every user to have a ChatGPT subscription. Python fine-tuning gives you control but requires building the entire chat interface, deployment pipeline, and monitoring infrastructure from scratch. A knowledge base chatbot platform handles all of this out of the box.
For further reading, you might be interested in the following:
• How Much Does a Chatbot Cost? Factors, Development & More
• How Do AI Chatbots Qualify Leads? (Strategies and Examples)
• 6 Ways to Make Chatbot Sound More Human
• How AI Chatbots Can Increase Sales Effectively


