A Shopify chatbot for tracking orders answers "where is my order?" automatically by pulling status from your Shopify Orders API and replying with a tracking link, ETA, and a fallback to a human agent. With LiveChatAI, you can ship one this week in eight steps and deflect 30 to 50 percent of post-purchase tickets.
Why a Shopify Order Tracking Chatbot Is the Highest-ROI Support Win in 2026
Most Shopify support queues look the same. Customers ask where their order is, when it'll arrive, and why the carrier hasn't scanned it in two days. After auditing dozens of Shopify support setups for our customers at LiveChatAI, I keep seeing the same pattern: WISMO ("where is my order?") tickets eat 30 to 50 percent of inbound volume, and almost none of them need a human.
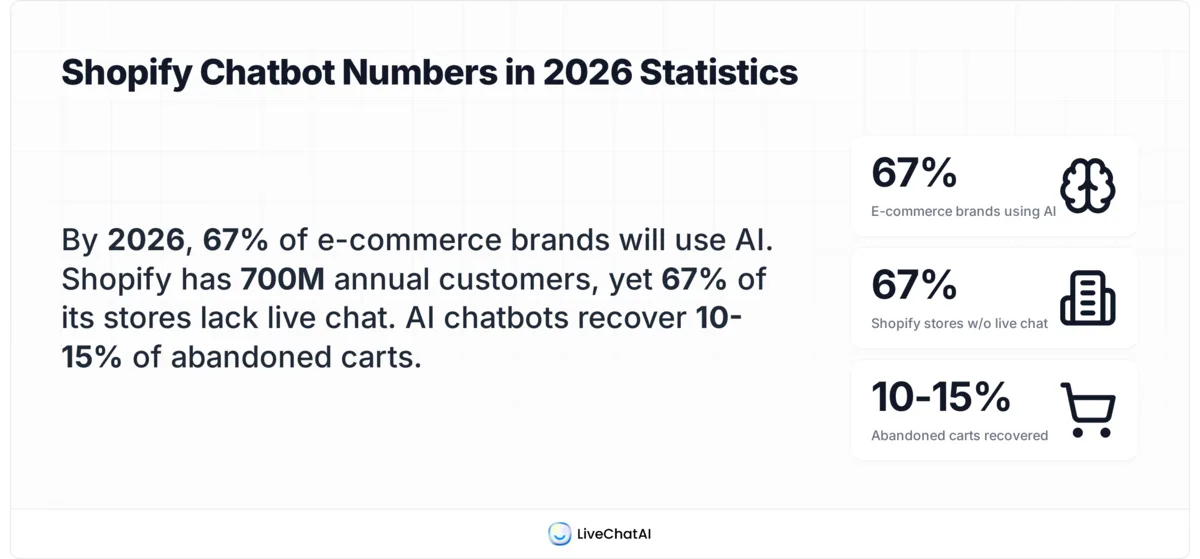
The 2026 numbers make the case hard to argue with. According to Shopify's 2026 Commerce Trends Report, 67 percent of online retailers have already adopted AI in some form. Meanwhile, an analysis from Garrio of 558,781 Shopify stores found that 67 percent still run with no live chat at all — meaning the gap between "AI-aware" and "actually answering customers in chat" is enormous.
Cost is the other half of the story. Per Yepai's 2026 cost benchmark, the average Shopify support interaction runs $12 to $18 by email, $8 to $12 over live chat, and $2 to $4 through AI. So a chatbot doesn't just relieve your inbox; it cuts the per-ticket cost by 4x to 6x. For a store handling 2,000 WISMO requests a month, that's the difference between a $24,000 monthly support bill and a $6,000 one.
And the audience is huge. Uptek reports that Shopify's reach now exceeds 700 million annual customers across nearly 175 countries. Add another data point: Digital Applied finds AI chatbot intervention at exit intent recovers 10 to 15 percent of abandoned carts. So the same widget that handles "where is my order?" also rescues a meaningful slice of revenue you'd otherwise lose.
The takeaway is simple. WISMO is the easiest, highest-volume, lowest-risk intent to automate, and 2026 is the year you stop letting agents copy-paste tracking links. Build a Shopify order tracking chatbot first, then layer on product help, returns, and recommendations.
How a Shopify Order Tracking Chatbot Works
A Shopify order tracking chatbot is a chat widget on your storefront that recognizes order-related intent, looks up the order in Shopify, and replies with the current status, tracking number, and ETA — without an agent. It runs on top of your store's data and the Shopify Orders API.
Here's what happens under the hood when a customer types "where is order #1029?" into the widget on your store.
1. Intent detection. The bot reads the message and classifies it as an order-status intent. LiveChatAI does this with the same model that handles your other store FAQs, so you don't have to write a separate flow.
2. Order lookup. The bot asks for an order number and email (or pulls them from the logged-in customer session), then calls Shopify's Orders endpoint with your store's API token. The response includes fulfillment status, tracking number, and carrier.
3. Reply with context. The bot composes a human-sounding reply: "Order #1029 shipped on April 22 via USPS. It's currently in transit and the carrier estimates delivery on April 30. Track it here: [link]." No copy-paste, no waiting on an agent.
4. Graceful handoff. If the order is late, lost, or marked as delivered when the customer says it isn't, the bot routes to a human with the full conversation history attached. The agent picks up where the bot left off — they don't have to ask for the order number again.
The whole exchange takes seconds. From the customer's side, it feels like a fast, smart support agent. From your side, it's a deflection engine that runs 24/7 in every time zone you sell into.
Build a Shopify Order Tracking Chatbot in LiveChatAI — 8 Steps
This is the exact 8-step setup I walk our Shopify customers through. Total time: about 45 minutes if your store is straightforward, longer if you want to fine-tune the design and add custom flows. You'll need a LiveChatAI account, your Shopify admin credentials, and editor access to your store's theme code.
Quick overview of the build:
1. Create your LiveChatAI account — sign up and create a new bot project.
2. Add your website as a data source — point the bot at your Shopify store URL or sitemap.
3. Configure human handoff — decide when the bot escalates and to whom.
4. Preview the bot's responses — test order-status messages before going live.
5. Adjust settings and customize the design — match your Shopify theme.
6. Get your embed code — copy the install snippet.
7. Edit your Shopify theme code — open theme.liquid in the code editor.
8. Paste the script in theme.liquid — install it before the closing body tag.
Step 1: Sign Up and Create Your LiveChatAI Account
Sign up at livechatai.com and create your first bot project. You'll land on the dashboard within about a minute. The free plan is enough to test order tracking on a small store, and you can move to paid tiers when you're ready to handle real volume.

From the dashboard, click Create New Bot, name it something concrete like "Acme Shopify Support Bot," and choose English as the primary language (you can add more later). Save and you'll see an empty bot project with placeholders for data sources, settings, and design.
You'll know it's working when: the dashboard shows your new bot in the project list with a "Not trained yet" status badge.
Watch out for:
• Using a personal Gmail for sign-up: If your team needs to share access later, switch to a shared support@ inbox before you train the bot. Migrating ownership later is possible but it's a 15-minute support ticket you don't need.
• Skipping the project name: "Untitled Bot" gets confusing fast if you spin up a second bot for a different store. Name it after the store from day one.
Pro tip: Before you train the bot on anything else, write down the three messages your customers send most often. In our customer audits, those three intents are usually "where is my order?", "can I change my shipping address?", and "what's your return policy?" — train for those first, then expand. I've watched stores try to launch with 40 trained intents on day one and end up shipping nothing.
Step 2: Add Your Website as a Data Source
The bot needs to know your store before it can answer questions about it. In the dashboard, open the Data Sources tab and choose Add Website. Paste your full Shopify store URL or your sitemap URL (usually at /sitemap.xml).

LiveChatAI will crawl your store and surface every page it finds. You'll see a list with checkboxes — product pages, collections, FAQ, shipping policy, returns, contact. Untick anything you don't want the bot trained on (legacy pages, marketing landing pages with outdated promos, internal team pages that somehow got indexed).

For order tracking specifically, three pages matter most:
• Shipping policy: Tells the bot your default carrier(s) and processing window.
• FAQ: Catches the long tail of edge cases — international orders, expedited shipping, holiday delays.
• Returns/exchanges: So when the bot resolves "where is my order?" with a "delivered" status and the customer says they didn't get it, it knows the next-step policy.
Hit Train AI and grab a coffee. A 200-page Shopify store usually finishes training in 5 to 10 minutes.
You'll know it's working when: the page count under the bot says "Trained on N pages" and the status flips to green.
Watch out for:
• Training on draft or password-protected pages: Crawlers can sometimes pick up theme preview URLs that aren't part of your live store. The bot then answers questions about products you don't actually sell. Filter the page list before training, not after.
• Forgetting to retrain after content updates: If you change your shipping cutoff from 2 PM to 5 PM, retrain the bot the same day. Otherwise it'll keep quoting the old time and confusing customers.
Pro tip: Add a Q&A pair manually for "where is my order?" with the exact reply pattern you want. It anchors the bot's tone for that intent and stops it from improvising weird responses on day one. I usually seed five WISMO variants — "track my order", "order status", "shipping update", "is my package shipped", "delivery date" — all pointing at the same response template.
Step 3: Configure Human Agent Handoff
Even the best chatbot can't resolve every order issue. Lost packages, damaged items, and refund disputes all need a human. The human handoff modal is where you decide when, how, and to whom the bot routes.

Open Settings → Human Handoff and toggle it on. You'll see three escalation triggers worth setting from the start:
1. Explicit request: When the customer types "talk to a human", "agent please", or "real person", the bot transfers immediately. Don't make people fight to reach you.
2. Repeated confusion: If the bot can't resolve the intent after two attempts on the same conversation, escalate. Loop avoidance matters more than deflection rate.
3. Specific intents: For order tracking, set "lost package", "damaged item", and "refund request" as auto-escalation triggers. The bot will still capture order number and context first, then hand off.
Choose where the handoff goes — your support inbox, a Slack channel, or live agents inside the LiveChatAI dashboard. The conversation history follows the customer, so the agent doesn't have to ask "what was the order number again?"
You'll know it's working when: typing "talk to a human" in the preview panel triggers the handoff message you configured.
Watch out for:
• Setting handoff to a single agent's inbox: If that person is on PTO, every escalation goes nowhere. Always route to a shared inbox or a rotating queue.
• Forgetting after-hours fallback: If you don't have 24/7 staffing, configure an auto-reply for off-hours escalations: "Our team will reply within X hours. In the meantime, here's your order status…" — and still resolve the WISMO question.
Pro tip: Set escalation thresholds based on your team's bandwidth, not on a vendor's "best practice." After helping Shopify stores ship order-tracking chatbots, I've found that small teams (1-2 agents) should escalate aggressively at first to build trust, then tighten the rules as the bot earns its keep. Big teams can let the bot try harder.
Step 4: Preview Your Bot's Responses
Before you embed anything, test the bot in the preview panel. This is the step most teams skip and regret later. The preview panel sits inside the dashboard and behaves exactly like the live widget will.

Run through a checklist of real customer messages — the same approach I recommend for testing AI chatbots for retail stores in any vertical. Use these:
1. "Where is my order #1029?" — bot should ask for email if there's no logged-in session.
2. "When will my package arrive?" — bot should pull ETA from the order data.
3. "It says delivered but I don't have it." — bot should escalate, not loop.
4. "Can I change my shipping address?" — bot should answer based on your shipping policy and offer escalation.
5. "Talk to a human." — bot should hand off cleanly.
Note any reply that's wrong, vague, or hallucinated. Edit the underlying Q&A pairs or shipping policy page, retrain, and test again. Two or three iterations usually gets the bot to a quality bar you'd be comfortable shipping.
You'll know it's working when: all five test messages get the response you'd want a human agent to give, with no awkward retraining loop in the middle.
Watch out for:
• Testing only happy-path messages: The bot will ace "where is my order?" and fail "I never got the package and the tracking shows delivered, can I get a refund?" Test the messy stuff first.
• Skipping spelling tests: Real customers type "wher iz my ordr". Run a few typos through the preview to make sure intent detection is forgiving.
Pro tip: Pull 30 to 50 actual messages from your last month of support tickets and run them through the preview verbatim. It's the fastest quality check I know. The first time I did this for a customer, we caught a hallucination about international shipping rates that would've created refund disputes within the first week.
Step 5: Adjust Settings and Customize the Design
This step splits into two: Settings (how the bot behaves) and Customize (how it looks). Both matter, but settings deserve more attention.

In Settings, configure these four:
1. Default language: Set to your store's primary market. LiveChatAI auto-detects and switches based on the customer's browser, but you want a sensible default.
2. Fallback message: What the bot says when it doesn't know. Replace the generic "I'm not sure" with something useful: "I don't have an answer for that, but our team does. Want me to connect you?"
3. Tone: Match your brand. A skincare store sounds different from a hardware tools store, and a wellness brand using a WhatsApp Shopify integration sounds different again.
4. Order number prompt: Tell the bot how to ask for an order number. "What's your order number? It usually starts with #." beats a bare "Order number?" every time.
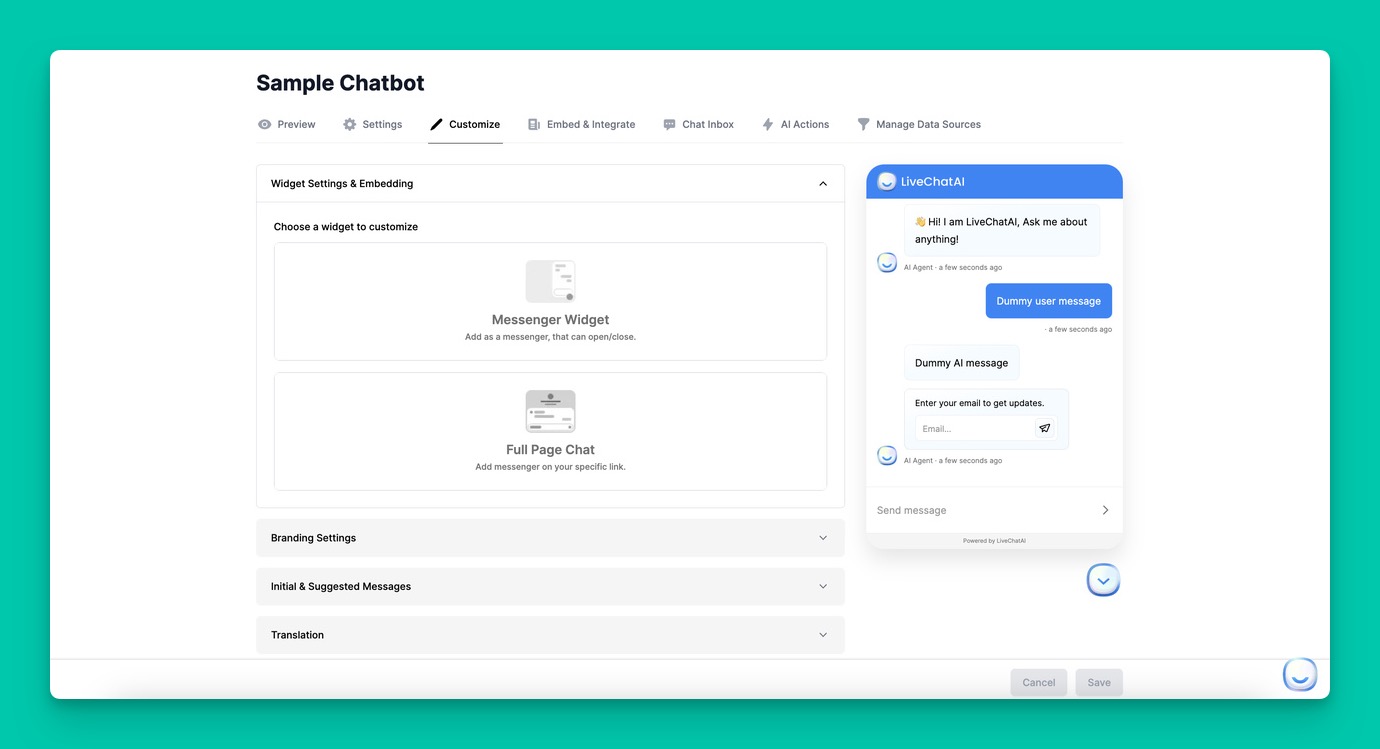
In Customize, match the widget to your Shopify theme. Set the primary color, upload your logo, and write a welcome message that signals what the bot can actually do — for example, "Hi! I can help with order tracking, returns, and product questions. What do you need?" Don't write "How can I help you today?" — it doesn't tell the customer what's on the menu.
You'll know it's working when: the live preview shows your brand colors, your welcome message, and your fallback response feels like something a human on your team would write.
Watch out for:
• Default purple-on-white widget on a black-themed store: The widget looks bolted on instead of integrated. Spend two minutes matching the color.
• Vague welcome message: "Hi there!" tells the customer nothing. Spell out what the bot can do.
Pro tip: Test the widget on mobile before you ship. Shopify stores skew heavily mobile, and a chat widget that covers the "add to cart" button on small screens will tank conversions. Resize your browser to 375px wide and confirm the widget collapses to a small bubble that doesn't block product CTAs.
Step 6: Get Your Embed Code
Now the bot is trained, behaving correctly, and styled. Time to install it. Open Embed & Integrate in the LiveChatAI dashboard and copy the JavaScript snippet. It's about ten lines and includes your unique bot ID.

The snippet is what tells your Shopify store to load the chat widget. Don't edit it. Don't try to "minify" it. Don't strip the bot ID. Just copy it as-is.
If you have a staging Shopify store (most agencies do, most solo merchants don't), install the snippet there first and run another preview pass. If you're going straight to production, that's fine for low-traffic stores, but commit to monitoring the first dozen conversations live so you can roll back fast if anything looks off.
You'll know it's working when: the snippet is on your clipboard and you can read your bot's unique ID in the JavaScript.
Watch out for:
• Copying the snippet from documentation instead of your dashboard: The dashboard snippet has your specific bot ID embedded. Generic doc snippets won't connect to your bot.
• Saving the snippet in a chat message or doc with smart quotes: Some apps auto-replace straight quotes with curly ones, which breaks the JavaScript. Paste it directly into the Shopify code editor.
Pro tip: Wrap the snippet install in a quick changelog note for your team — "Installed LiveChatAI chatbot on theme.liquid, 2026-04-28, bot ID livechatai_xxx". When something breaks two months from now and a developer is hunting for what changed, that note saves an hour of git archaeology.
Step 7: Edit Shopify Theme Code to Embed
From your Shopify admin, click Online Store → Themes. Find the theme you want to install the bot on (usually the one marked "Current theme") and click the three-dot menu, then Edit code.
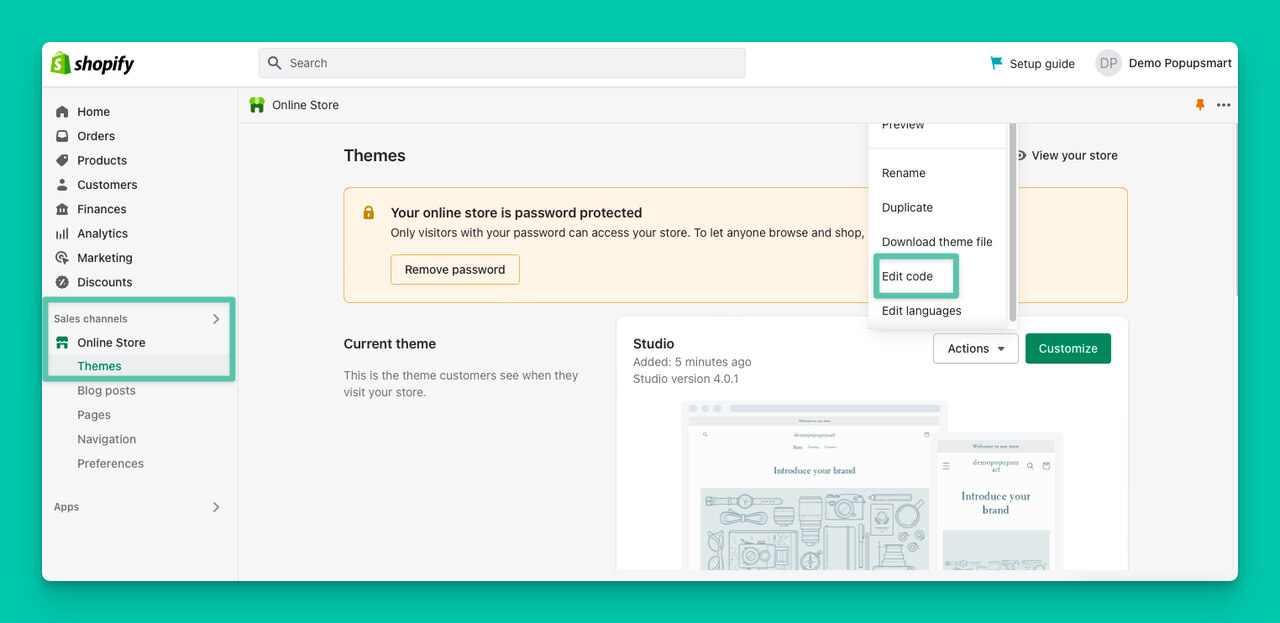
Shopify will open the code editor. The left sidebar lists every file in the theme: layout, templates, sections, snippets, assets. You're going to edit one file — theme.liquid — which controls the layout of every page on your store.
Before you make any changes, duplicate the theme. Click Themes → Actions → Duplicate on the previous version. If anything goes wrong, you can publish the duplicate in one click and roll back instantly. This is a 30-second insurance policy.
You'll know it's working when: you see theme.liquid open in the editor with the full HTML markup of your store layout.
Watch out for:
• Editing the wrong theme: If you have multiple themes (a draft, a holiday version, a backup), make sure you're editing the live one. The published theme has a green "Current theme" badge.
• Not duplicating before editing: Skipping the duplicate is the most expensive 30 seconds you can save. Just do it.
Pro tip: If your store uses a Shopify 2.0 theme with sections everywhere, double-check that theme.liquid still wraps the body. Some heavily customized themes use a different layout file. Search the layout folder for the file that contains the closing body tag — that's the one you want.
Step 8: Paste the Chatbot Script in theme.liquid
Open theme.liquid in the code editor. Scroll to the bottom and find the closing body tag. Paste your LiveChatAI snippet on the line directly above it.

Click Save in the top-right of the code editor. Open your storefront in a new tab — the chat widget should appear in the bottom-right corner within a few seconds. If it doesn't, hard-refresh (Cmd+Shift+R or Ctrl+Shift+R) to bypass the browser cache.
Now do a real test. Open an incognito window, go to your store as a customer would, click the widget, and ask "where is my order #[real test order number]?" The bot should pick it up, prompt for the email, and reply with the live status. If it does, you're shipped.
You'll know it's working when: the chat bubble appears on every page of your store and successfully resolves a real WISMO test question end to end.
Watch out for:
• Pasting after the closing body tag: Browsers will still render it in most cases, but it's invalid HTML and can break some validators. Paste before, not after.
• Conflict with another chat widget: If you've got an old chat plugin still installed, two widgets will fight for the same screen position. Uninstall or disable the old one.
Pro tip: Watch your first 50 live conversations in the LiveChatAI inbox the day you launch. Don't go to bed yet. You'll spot tone issues, broken intents, and one or two embarrassing replies in the first day that no preview test would have caught. Fix them in real time and your bot's quality compounds fast.
Connect the Chatbot to Shopify Order Data
Reading store content is one thing. Reading live order status is the harder, more valuable part. To return real-time order status, your chatbot needs authenticated access to the Shopify Orders API. Here's how the wiring works.
1. Generate a Shopify Admin API access token. In your Shopify admin, go to Settings → Apps and sales channels → Develop apps. Create a new app called something like "LiveChatAI Order Lookup," then under API credentials → Configure Admin API scopes, grant read_orders, read_fulfillments, and read_customers. Install the app and copy the access token. Treat it like a password.
2. Connect the token in LiveChatAI. Inside your bot project, open Integrations → Shopify, paste the token, and enter your shop domain (e.g., acmegoods.myshopify.com). Save and run the connection test. If it returns a sample order, you're good.
3. Authenticate the customer. Don't return order details to anyone who types a number. Configure the bot to require either the email on the order or the customer's logged-in Shopify session. This is a basic anti-fraud check that protects your store from social-engineering attacks. The Shopify Orders API supports filtering by email + order number, so the validation step is built in.
4. Format the response. The API returns raw JSON. The bot reformats it into something a customer can read: shipping carrier, tracking number, tracking URL, and ETA. For multi-item orders, list each fulfillment separately so customers know if part of the order shipped and part hasn't.
5. Hook a webhook for proactive updates (optional, high impact). Use Shopify's fulfillments/create and fulfillments/update webhooks to push status changes back into the chat. So a customer who asked yesterday gets a follow-up: "Your order #1029 just shipped — tracking link here." This single feature turns a reactive bot into a retention tool.
One non-obvious detail: Shopify rate-limits the Admin API at 2 requests per second on standard plans and 4 per second on Plus. If you're a high-volume store, batch lookups or cache responses for 5-10 minutes to stay under the ceiling.
Best Practices for Shopify Chatbot Order Tracking
The setup is the easy part. Running a chatbot well over the long term takes a few habits that aren't obvious on day one. Here's what I'd push every Shopify store to do.
1. Send proactive status updates, don't wait to be asked. The biggest mental model shift is using the chatbot to push, not just pull. When the carrier scans a package as out-for-delivery, push a chat notification: "Your order is out for delivery today." It cuts the inbound WISMO volume by another 30 to 40 percent on top of what reactive answers cover. Locus reports that companies implementing full real-time tracking see 40 to 60 percent reductions in delivery-related customer service inquiries.
2. Match the customer's language automatically. Shopify's reach extends across nearly 175 countries, and a chatbot that only speaks English locks you out of most of them. LiveChatAI auto-detects browser language and replies in kind for over 90 languages, similar to what we recommend for any modern ecommerce live chat setup. The big payoff isn't the translation itself — it's that a French shopper buying from a US store now feels like the store cares enough to meet them halfway.
3. Tune the tone for your brand, not the vendor's defaults. Out-of-the-box bots sound corporate. If your brand is playful, write welcome messages and fallback responses with personality. If you're premium, lean formal. The customer should not be able to tell where your brand voice ends and the bot begins.
4. Set escalation thresholds based on your team's bandwidth. A two-person support team can't handle aggressive escalation. A 20-person team can. Start with a high escalation rate (when in doubt, hand off) and tighten as the bot earns trust. Track the metric weekly: deflection rate, customer satisfaction on bot-resolved tickets, and average time-to-resolution. If satisfaction drops, tighten the threshold and let humans take more.
5. Respect the human-preference signal. A study cited by Shopify found that 49 percent of customers prefer talking to a live human over an AI chatbot when seeking customer support. Read that as a constraint, not a defeat — your bot should never block, hide, or delay the path to a human. The customers who want a human and get one fast become loyal. The ones who feel trapped in a loop don't come back.
6. Treat the bot's transcripts as a research goldmine. Every week, skim the lowest-rated bot conversations and the ones that escalated. The themes show you what to train next, what FAQ to write, and which product page is missing key info. After auditing dozens of Shopify support setups, I've found this single habit produces more roadmap insight than any survey.
7. Tie chatbot conversations back to revenue. Use Shopify's session and Orders APIs to attribute purchases to chatbot conversations. If a customer chatted with the bot before checkout, log it as an assist — the same attribution pattern we use for the Shopify WhatsApp chatbot setups our team helps merchants ship. The data closes the loop on whether your bot is just a cost center or a revenue lever.
Common Shopify Chatbot for Oder Tracking Mistakes to Avoid
Most failed Shopify chatbot rollouts fail in the same four ways. If you can sidestep these, you're ahead of 80 percent of stores that try this.
1. Launching with too many trained intents. Teams try to handle 30 question types on day one and end up with a bot that's bad at all of them. Start with WISMO and three other top intents, ship, then expand. The bot's quality reputation is set in the first two weeks.
2. Hiding the path to a human. If the customer types "agent" and the bot keeps trying to answer, you've lost trust. Make the handoff path obvious from message one. Customers who reach a human fast are 2x more likely to come back.
3. Forgetting to retrain after policy changes. Update your shipping policy, change carriers, raise free-shipping thresholds — and the bot will keep quoting the old version until you retrain. Add "retrain bot" to the checklist for any policy edit.
4. Treating the chatbot as set-and-forget. A chatbot is a product, not a project. Review transcripts weekly, fix bad responses, add new intents as they emerge in conversation logs. The stores that get the most out of chatbots are the ones that treat them like a junior agent who needs ongoing coaching.
Ship Your Shopify Order Tracking Chatbot This Week
The first step is the smallest one: sign up for a LiveChatAI account, point it at your Shopify store URL, and run the preview against five real customer messages from your last support week. Inside an hour you'll know whether this is going to deflect 30 percent of your tickets or 50 percent.
Then build the rest in order: human handoff, settings, design, embed. Don't try to launch with every intent trained — ship the WISMO bot first, watch the inbox for two weeks, and add intents as customers ask for them. If you're an agency setting this up for a client, the same playbook applies, just on a longer review cadence.
Two final things worth borrowing from the audits I've done: read transcripts every week, and never hide the path to a human. Stores that treat their chatbot as a living product — not a one-time install — see deflection rates climb month after month, and they keep customer satisfaction high while doing it. The ones that ship and forget end up with an angry inbox six months later. Pick the first kind.
Frequently Asked Questions
Will the Shopify Chatbot Respond During Non-Working Hours?
Yes. A Shopify chatbot built on LiveChatAI runs 24/7 and answers customer questions outside your business hours. That's the whole point — your customers in different time zones, or the ones who shop late at night, get instant order tracking instead of waiting until your team logs on the next morning. Only escalations to a live agent will queue until you're back.
Can the Shopify Chatbot Suggest Products to Customers?
Yes. Beyond order tracking, a Shopify chatbot can recommend products based on a customer's browsing history, past purchases, or stated preferences. If a customer comes in to track an order and mentions liking the product, the bot can suggest a complementary item or a refill. It's a low-friction way to lift average order value without an additional touchpoint, and it's one of the more obvious chatbot business ideas that compounds over time.
Can I Customize the Responses of My Shopify Chatbot?
Yes. LiveChatAI lets you customize tone, welcome messages, fallback responses, and individual reply templates so the bot sounds like your brand. You can also add Q&A pairs by hand for specific intents — useful when you want full control over how the bot answers your most common questions, like "where's my order?" or "what's your return policy?"
How Much Does a Shopify Order Tracking Chatbot Cost?
It depends on volume, but the math is favorable. LiveChatAI offers a free plan for small stores and paid tiers that scale with conversation volume. To put it in context: per Yepai's 2026 cost benchmark, the average Shopify support interaction costs $12 to $18 by email and $2 to $4 by AI. A store handling 1,000 WISMO tickets a month is looking at roughly $12,000 a month in agent time vs. a few hundred dollars in chatbot subscription — payback in week one.
Does the Chatbot Integrate With Shipping Carriers Like UPS, USPS, and DHL?
Indirectly, yes. The chatbot pulls tracking data from Shopify's Orders API, which already includes the carrier name and tracking number from whichever carrier you ship with — UPS, USPS, DHL, FedEx, or any other carrier connected to your Shopify fulfillment. The bot then formats that data into a reply with a live tracking link. So you don't need a separate carrier integration; if Shopify knows the tracking, the bot does too.
For further reading, you might be interested in the following:
How to Create a Shopify WhatsApp Support Chatbot


